To create a Delivery Zone in GoTab, you must first create your map in Google. This will define the boundaries of your delivery area.
- Navigate to Google Maps to get started
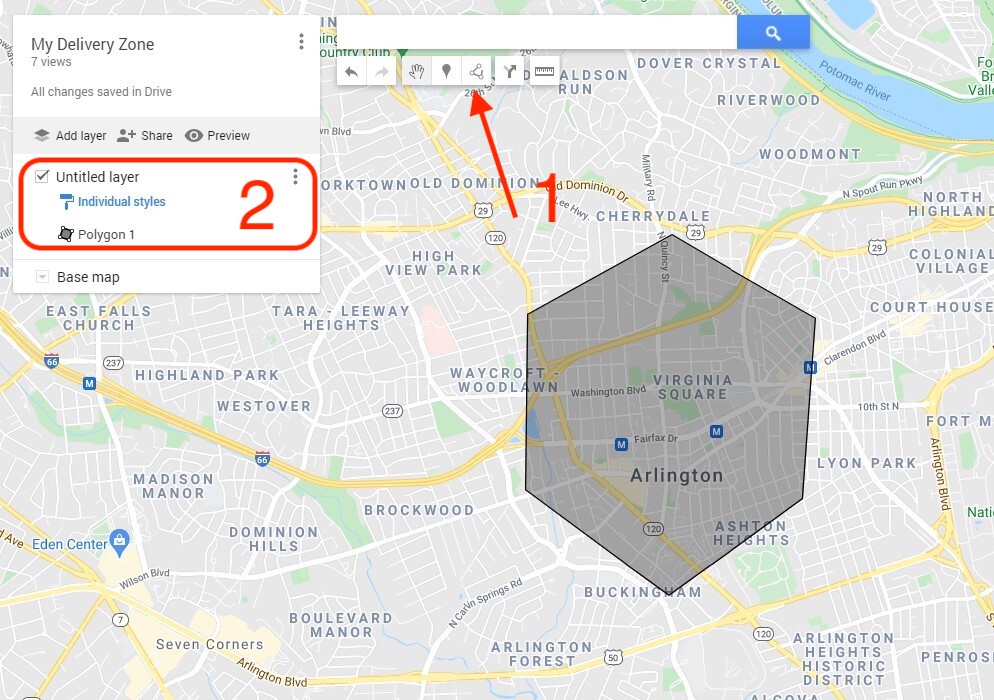
(1) Use the drawing tool to create a region.
-
- Important: The region must be completely closed and drawn with a continuous line.
(2) Select the menu tool on the layer for your map.

(1) Open Menu
(2) Select Export to KML/KMZ
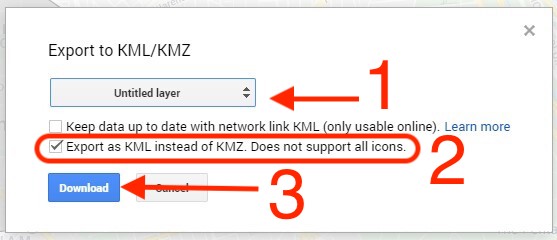
(1) Select the appropriate layer
(2) Check "Export as KML instead of KMZ..."
(3) Download
- Once you have the .KML file of your delivery map, please email the file to your GoTab Account Manager and they will upload the map for you.
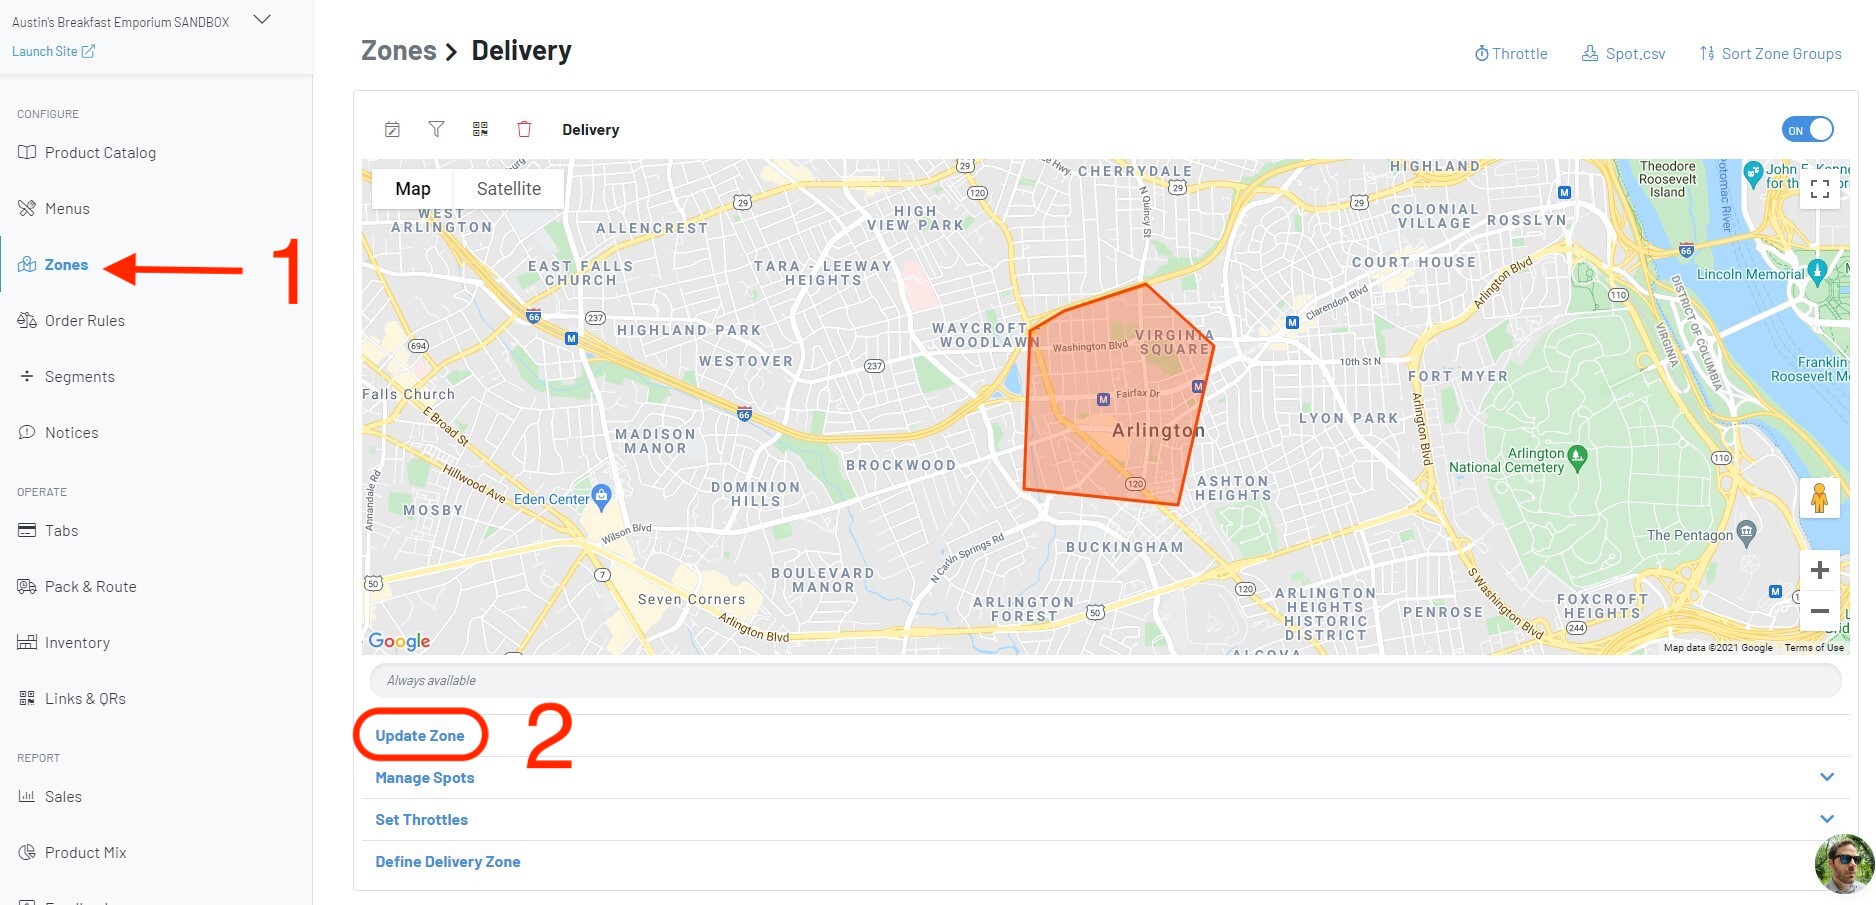
(1) Navigate to the Zones section of the manager dashboard
(2) Select "Update Zone"
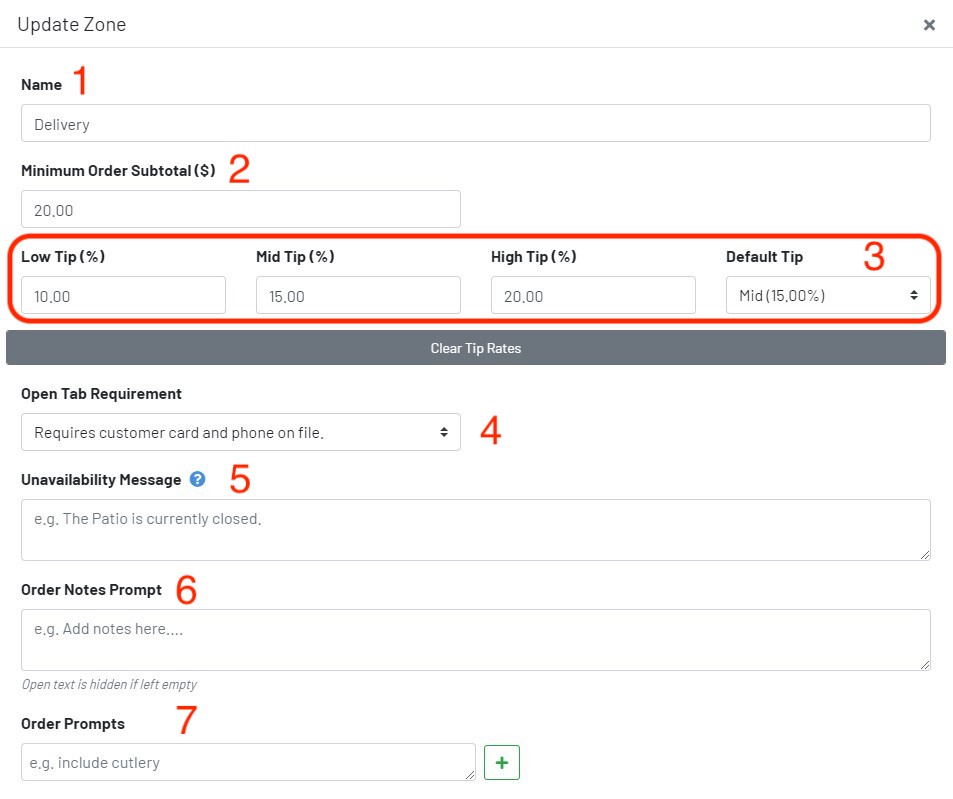
(1) Name of the Zone (a container for spots [QRs]). This could be a specific pickup location like East Entrance or Host Stand. Whatever best communicates to the kitchen/expo - it will be printed on the order ticket.
(2) Minimum amount of purchases (in dollars) required to place an order.
(3) Tip scale. You can make different tip scales per zone or you can leave it blank which will default to the master tip scale in location configurations.
(4) Requires the customer to have a phone number and verified CC on file. Takeout does not allow open tabs. Orders must be paid before tickets print (or pop up on the KDS) at your location.
(5) A brief message when the Zone is off should the guest try to place orders after hours.
(6) A pre-filled message in the notes before the guest writes their own (guests can write openly in this section before checking out which will print on tickets and display on the KDS).
(7) Customized checkbox prompts for the guest checkout page (napkins, sauce, etc.)
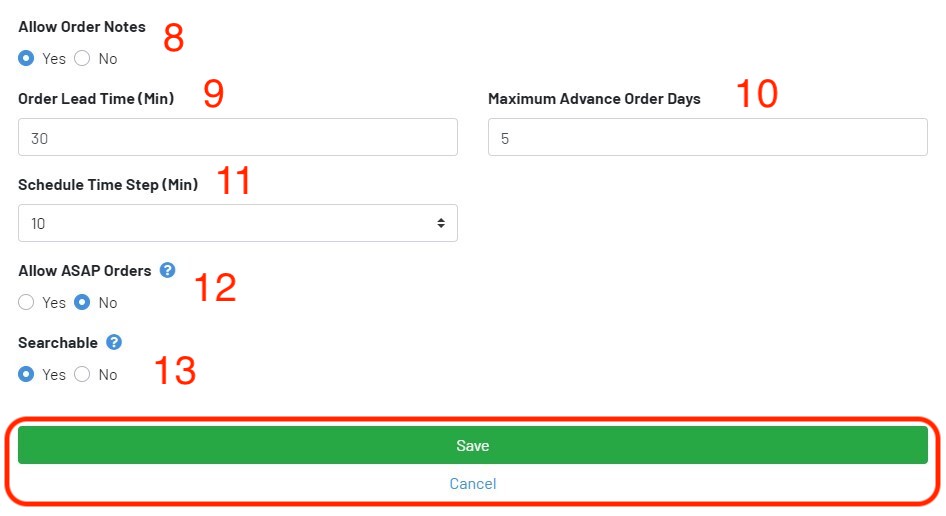
(8) Allows open text field for guests to write freely during checkout. Prints on tickets, and displays on the KDS.
(9) Time needed to fulfill when the guest places an order. *
(10) Furthest ahead takeout orders can be placed.
(11) Interval selections while guest is ordering: 5, 10, 15, 30 mins. *
(12) Allows immediate orders with 0 lead time.
(13) Allows the guest to select the delivery spot from your main location page (recommended to leave on). If this is off they will have to scan a QR to order from that spot - they won't be able to find it from the main location page.
For a zone to be functional you MUST make a spot.
Navigate to the Zones page:
(1) Click "Manage Spots"
(2) Click "+" Symbol
Single Spot creation tool: Makes your QR codes - accessed on the QRs page.
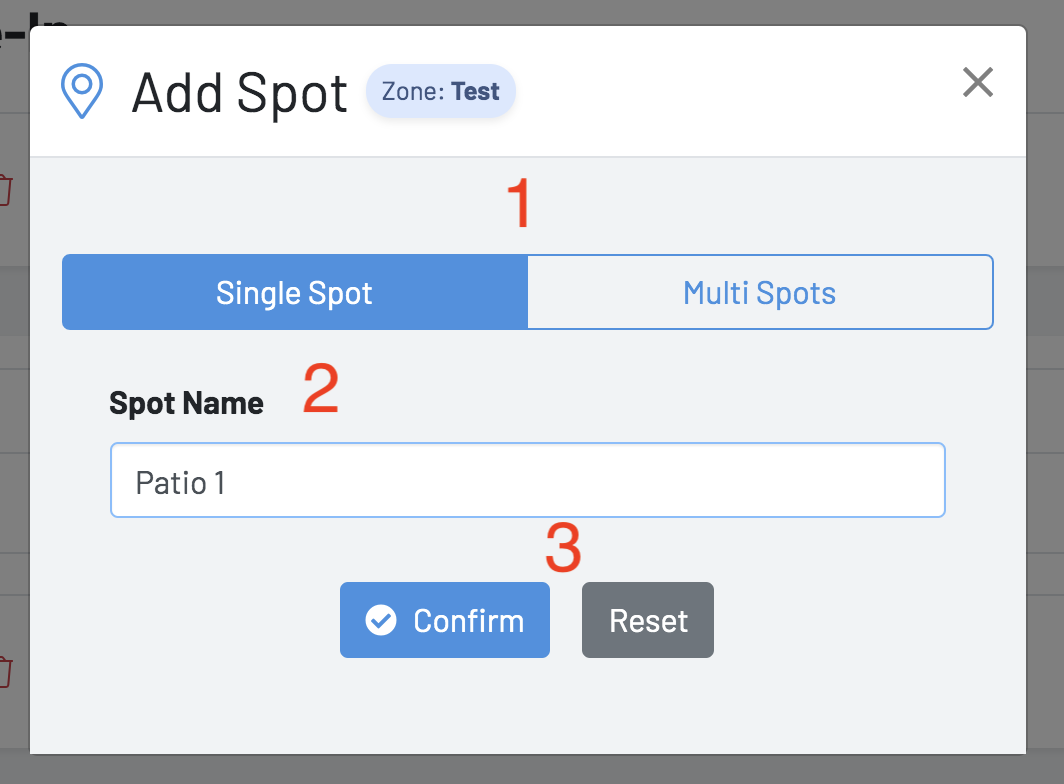
(1) Select "Single Spot" (creates 1 QR) or "Multi Spots" (creates batch QRs)
(2) Name your spot
(3) "Confirm" to save changes or "Reset" to start over.
Multi Spots batch creation tool: Make multiple QRs at once.
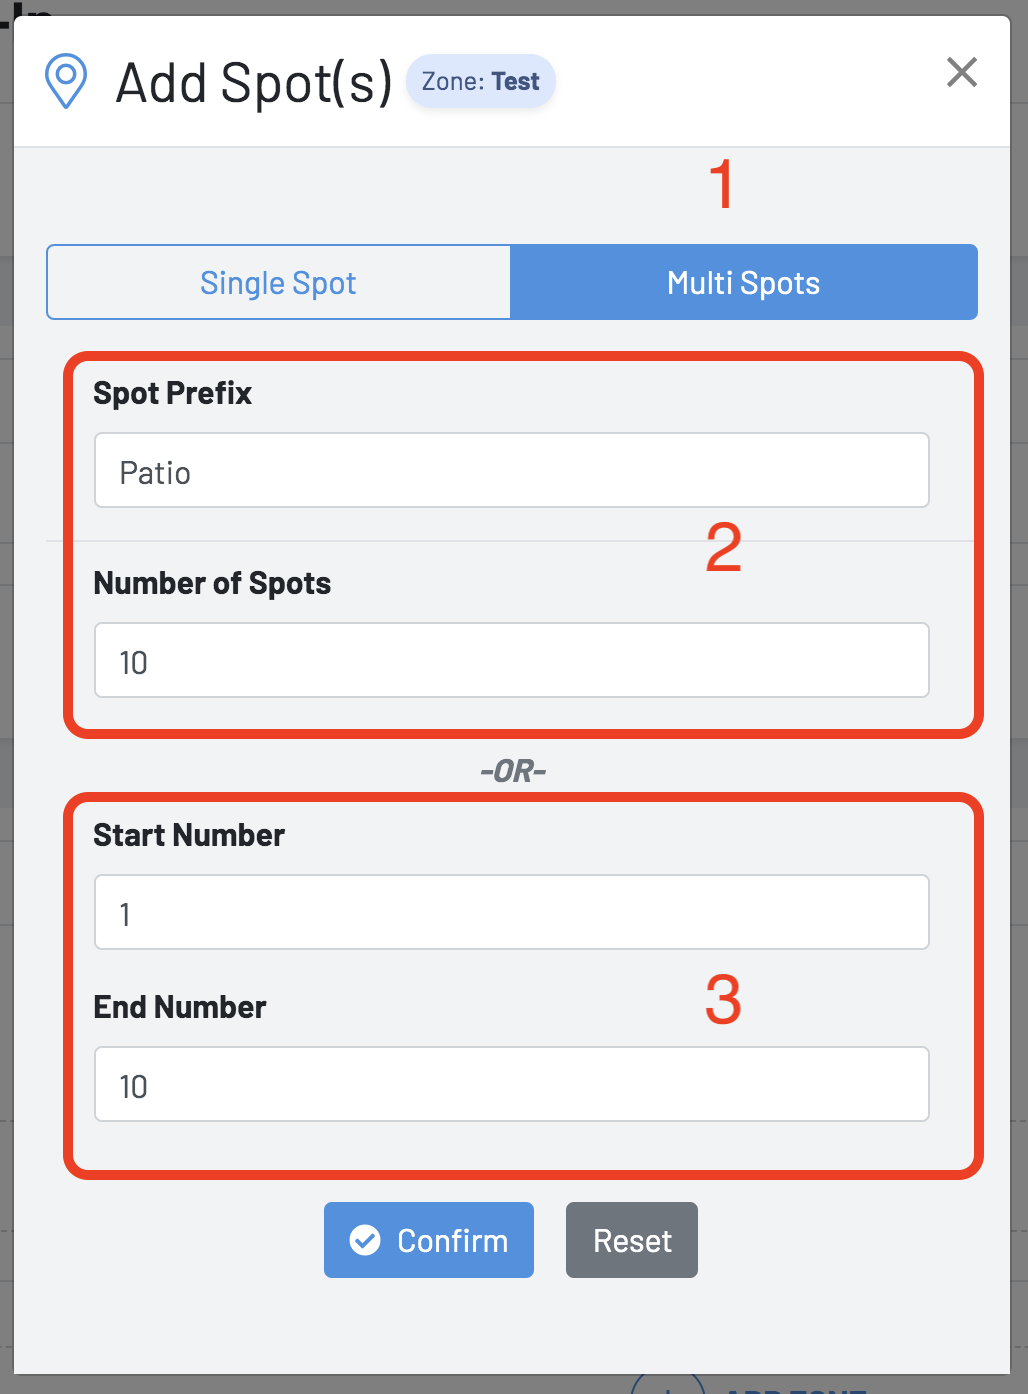
(1) Select "Multi Spots"
(2) Name your Spot in the "Spot Prefix" box and designate number of spots
OR
(3) Name the "Spot Prefix" and enter a Start / End number of Spots.
- *Fields (9) and (11) under "Update Zone" can be used for order throttling
- Navigate to the "Links & QRs" page in the GoTab menu to access your new Spot QRs
- Set up a delivery fee