To create a new Dine-In Zone:
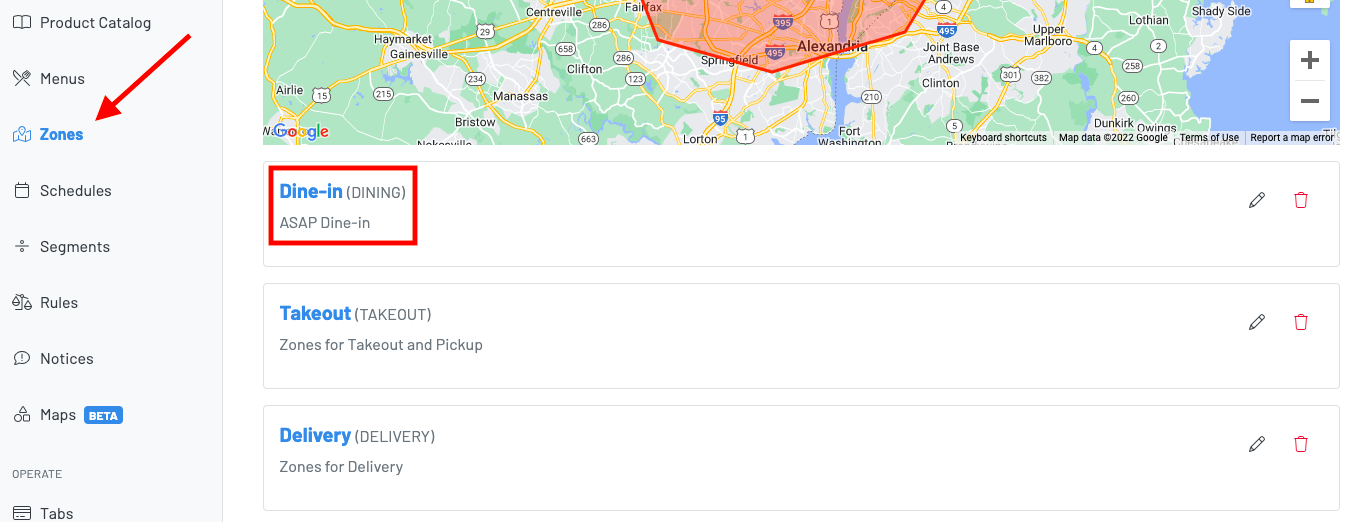
(1) Navigate to the Zones page in the GoTab Manager Dashboard
(2) Select "Dine-In"
Add the Zone:
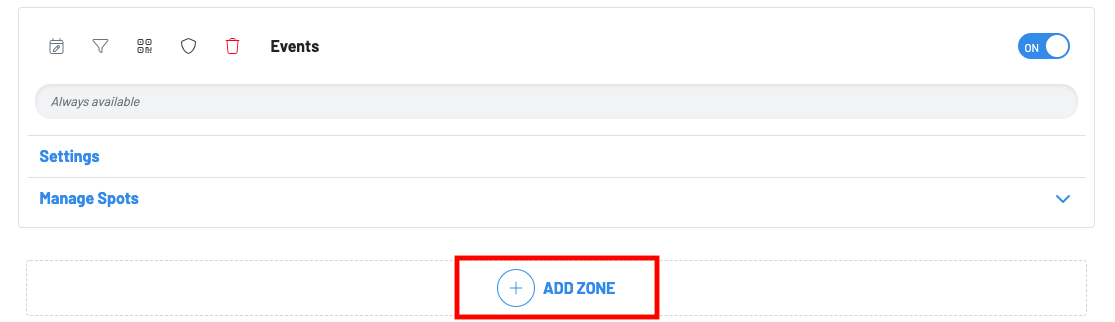
Scroll down and press + add zone
Fill out the New Zone info. This info will apply to all spots (table QRs) within the zone. Different rules for different spots will require a new zone.
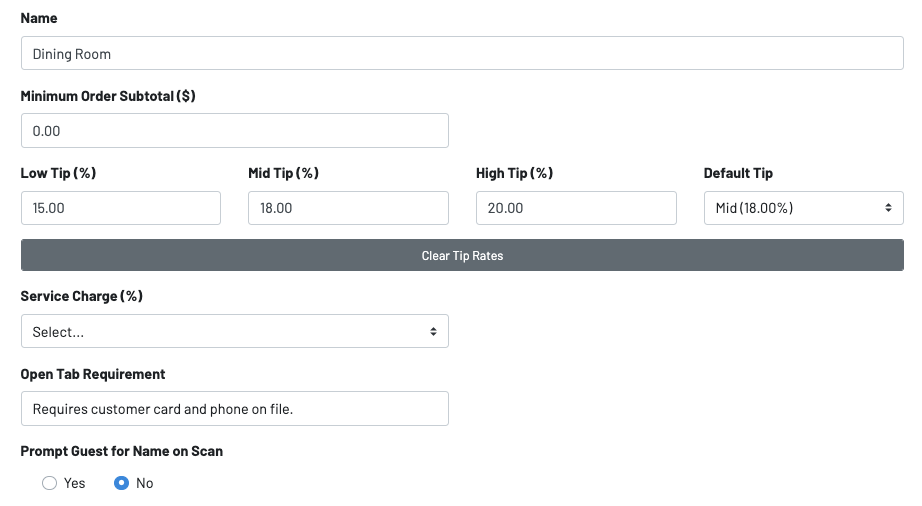
- Name
- Minimum order subtotal: amount of purchases (in dollars) required to place an order.
- Tip Scale: Configure different tip scales per zone. You will also select the default tip here.
- Service Charge: Set autograt percentages in Location Settings: Fees and apply the percentages to individual zones.
- Open Tab Requirement: The information a location wants guests to input before they open a tab.
- Prompt Guest for Name on Scan: You can choose to set this to yes or no.
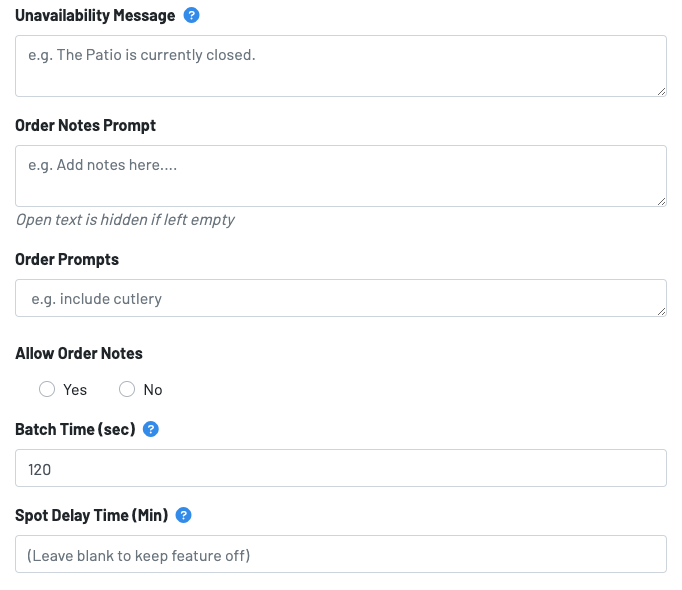
- Unavailability Message: A brief message should the guest try to place orders after hours.
- Order Notes Prompt: A text box that appears at the end of the guest ordering flow to account for any guest requests. The guest notes will appear on printed tickets and on the KDS.
- Order Prompts: Customized prompts that are either checkboxes or an open text field for the guest to write-in displayed on the payment screen.
- Allow Order Notes: Order notes is an open text field for guests to write freely during checkout. The guest notes will appear on printed tickets and on the KDS.
- Batch Time (sec): Orders from the same spot within this time will display on one ticket on the KDS.
- Spot Delay Time (Min): Orders from the same spot placed within this time will fire and print one after the other, if enabled.
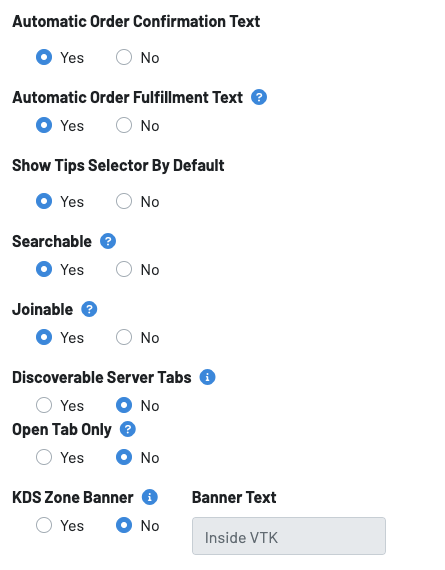
- Automatic Order Confirmation Text: This sends the guest an SMS message confirming their order.
- Automatic Order Fulfillment Text: Allows you to automatically text a guest once the order is marked as fulfilled on the KDS. (You must turn this on in the KDS settings as well)
- Show Tips Selector By Default: This setting controls whether the guest views the tip selector bar.
- Searchable: Hides this zone from any spot selectors. The spots in the zone may only be accessed by scanning a code or using a direct link. This should always be enabled.
- Joinable: Allows open tabs to be joinable at this zone.
- Discoverable Server Tabs: Allow tabs started by servers to be discoverable when guests scan the spot QR.
- If Discoverable Server Tabs is toggled on as YES: Initial Tab Discoverable: Allows operators the ability to choose the time that discoverable tabs start at.
- Open Tab Only: Automatically opens a tab for the guests. Open tabs must be enabled at the location level (Location Settings: Edit > Open Tabs are toggled ON).
- KDS Zone Banner: This allows you to clearly distinguish orders from specific zones that need to be packaged or handled differently. The default banner name will be the name of the zone, however, you can edit it to whatever you want. You can then choose a color for the banner.
For a zone to be functional you MUST make a spot.
Navigate to spots on the Zones page:
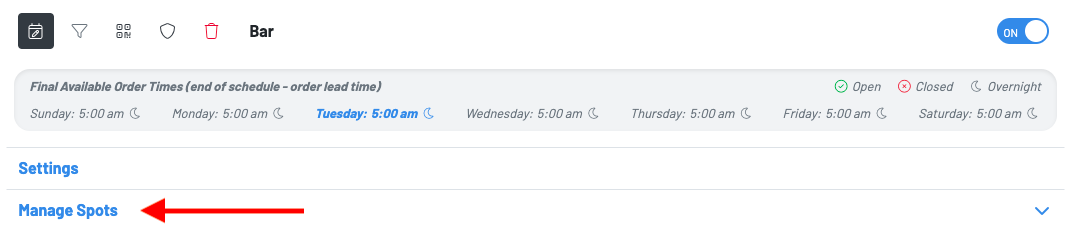
(1) Click "Manage Spots"
(2) Click "+" Symbol
Single Spot creation tool: Makes your QR codes - accessed on the Links & QRs page.
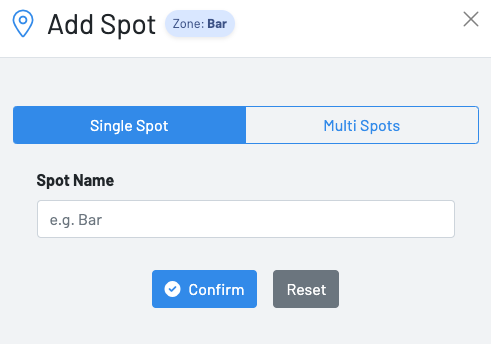
(1) Select "Single Spot" (creates 1 QR) or "Multi Spots" (creates batch QRs)
(2) Name your spot
(3) "Confirm" to save changes or "Reset" to start over.
Multi Spots batch creation tool: Make multiple QRs at once.
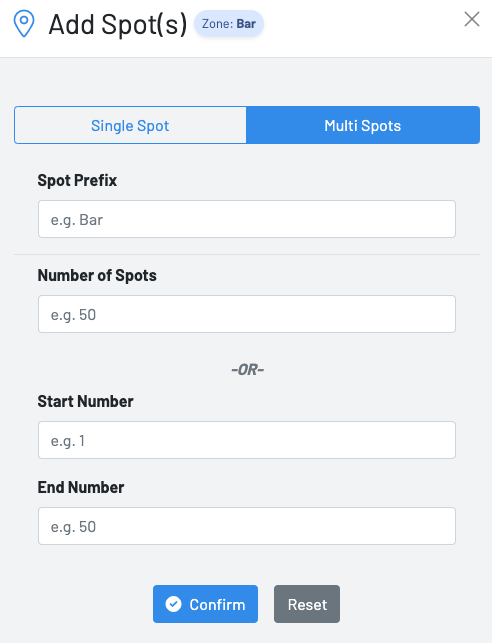
(1) Select "Multi Spots"
(2) Name your Spot in the "Spot Prefix" box and designate number of spots
OR
(3) Name the "Spot Prefix" and enter a Start / End number of Spots.
- Navigate to the "Links & QRs" page in the GoTab menu to access your new Spot QRs.
- See more information about Spot Management.