-
Getting Started
-
Server Training
-
Menu Management
-
POS
-
KDS, Printers & Additional Display Setup
-
Processors: Cash, Gift Cards & House Accounts
-
Integrations
-
Managing Your Tabs
-
User Experience
-
Cart Rules, Segments & Loyalty/Memberships
-
Manager Dashboard
-
Pack & Route
-
GoTab Apps
-
GoTab Marketplace
-
Product Spotlight
-
GoTab Manager Dashboard Announcements
Zone Scheduling
Zone Scheduling, Scheduling Structure
Feature Definition: “How to schedule a Zone”
When to Use:
- Dine in
- Takeout
- Delivery
- Server
- POS
- Concierge
- Multi-Location
Benefits: Automatic order availability for each zone
Overview:
- Zones Scheduling is one piece of scheduling that lives within GoTab. There are cases where you may want to adjust Location Schedules instead. If you want control over each zone its better to delete your Location Schedule and use Zone Schedules instead.
- The general hierarchy of schedule control is as follows:
- Location Schedule > Zone Schedule > Category Schedule > Item Schedule
- It is recommended to examine your schedule in this order to avoid contradictions and overlaps. Always lean towards the most simple scheduling solution within GoTab.
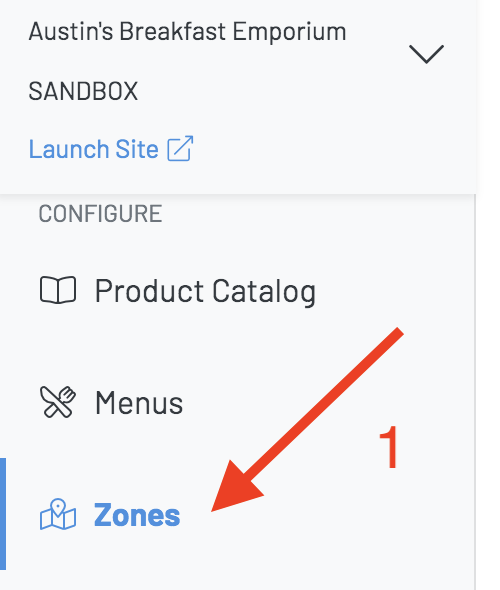
(1) Select Zones from the Manager Dashboard menu
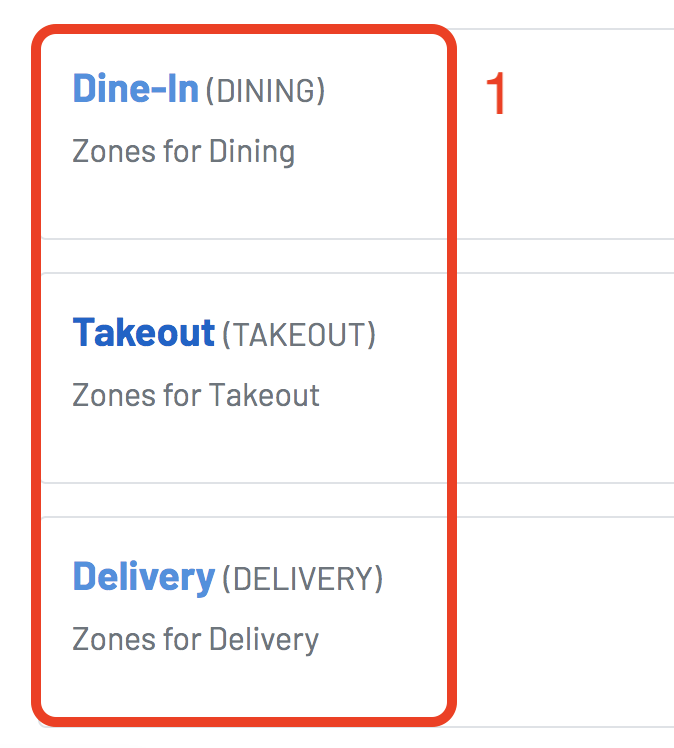
(1) Choose the appropriate Zone you wish to schedule.
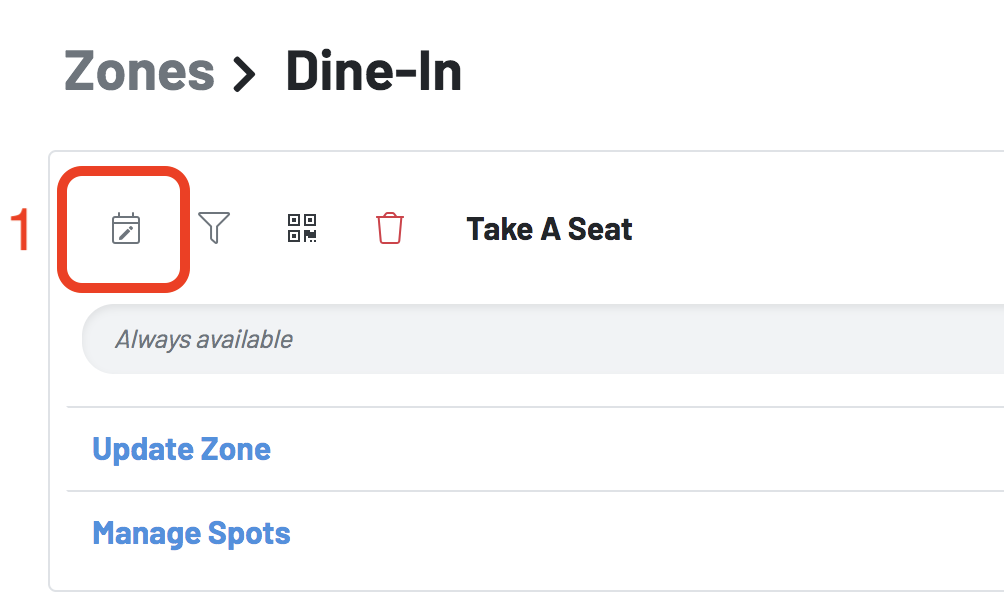
(1) Click the schedule icon

Click "ADD NEW SCHEDULE"
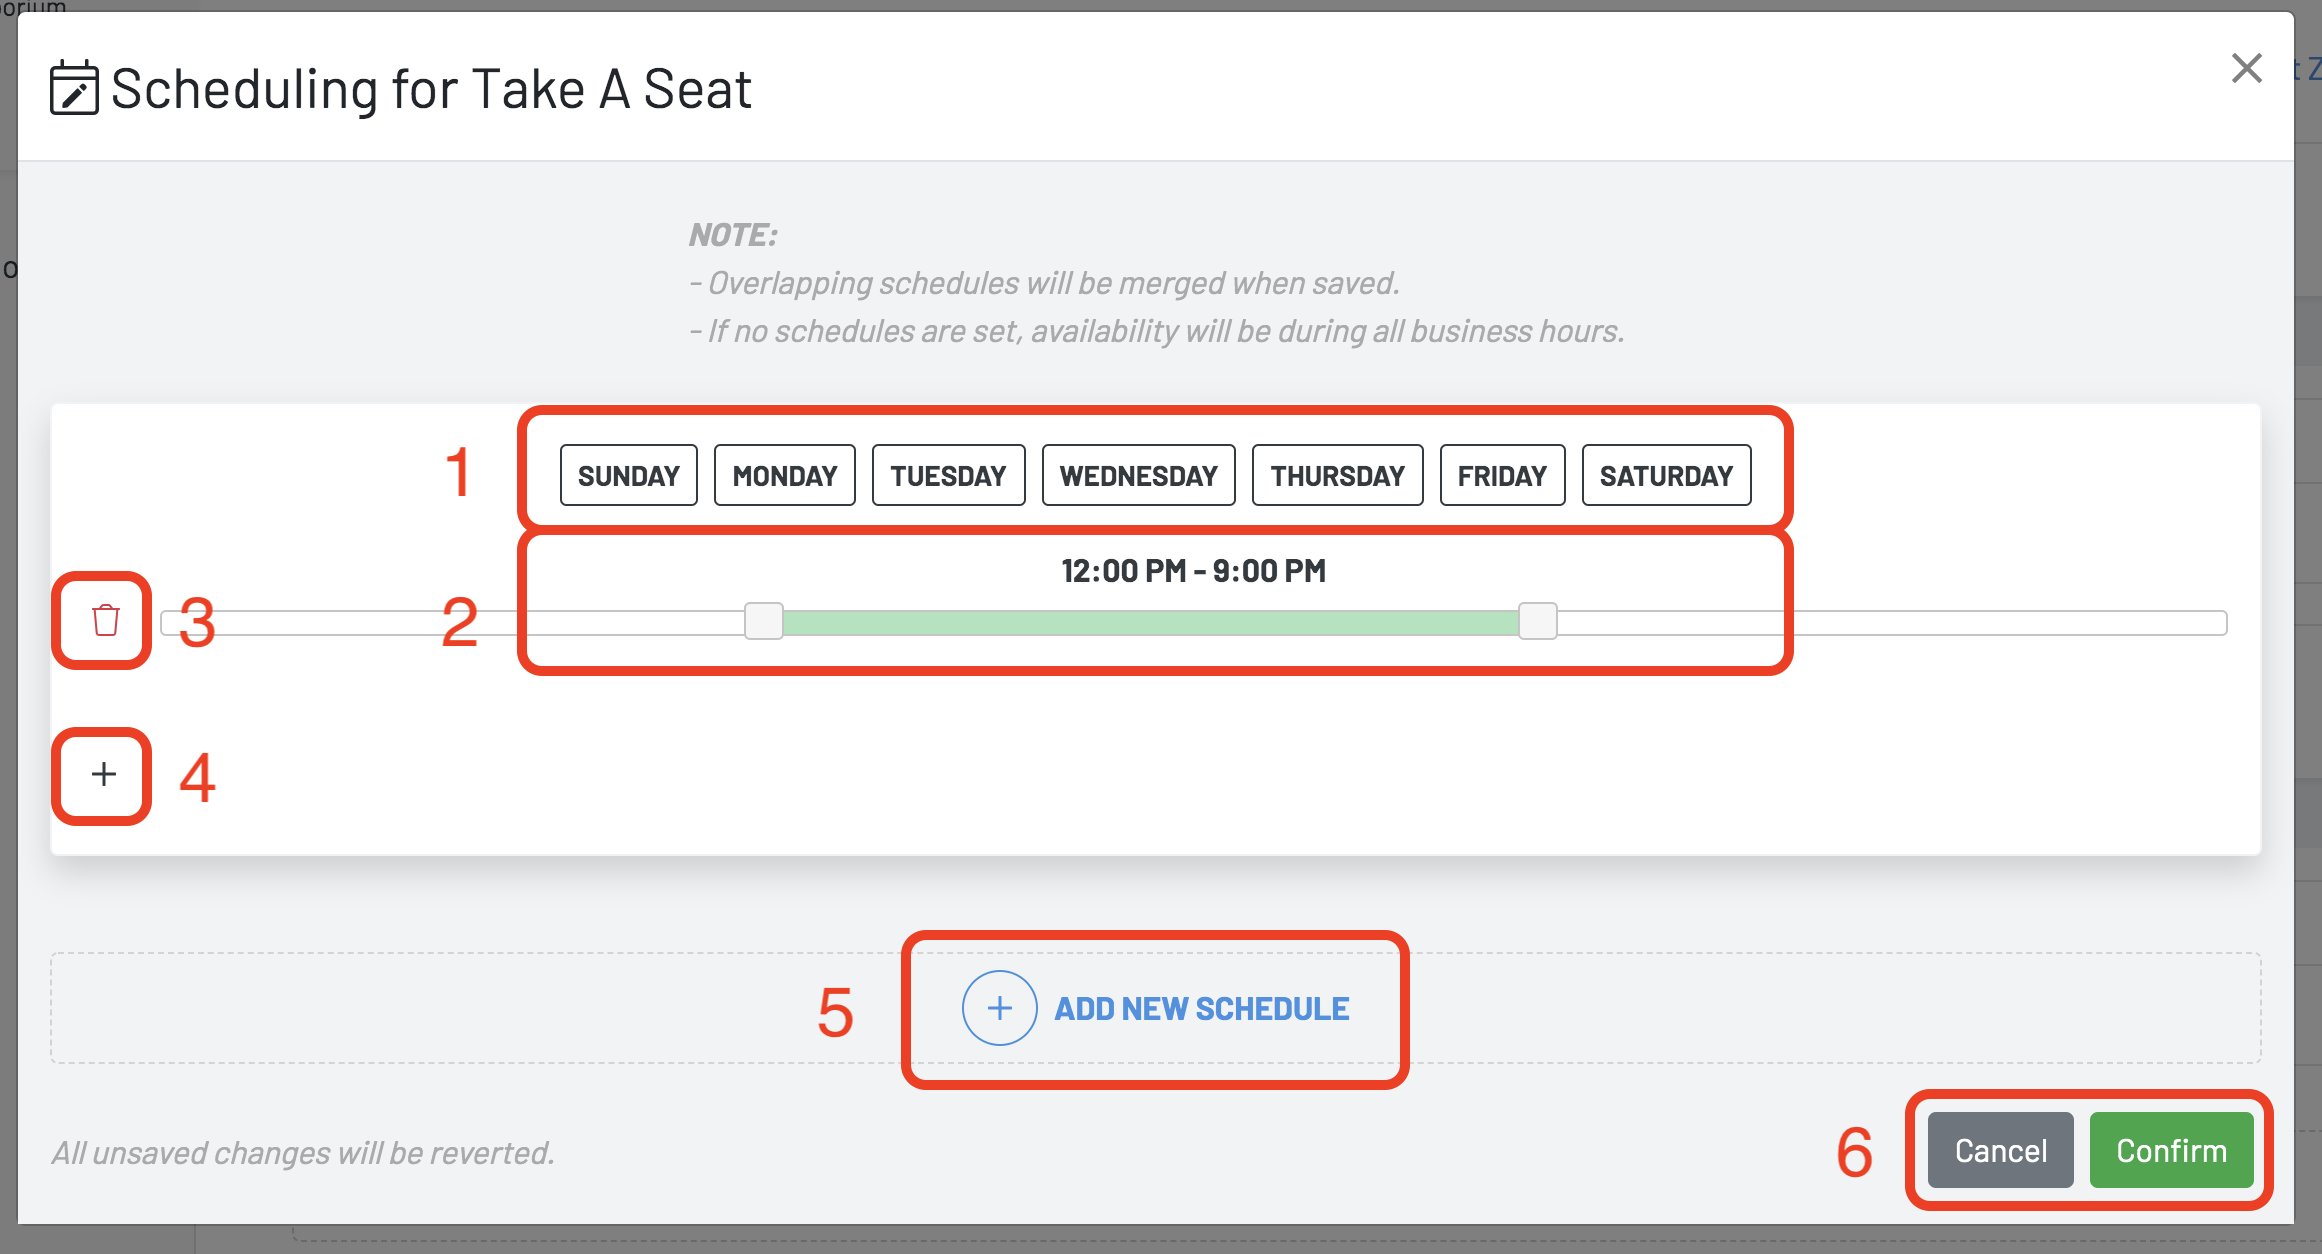
(1) Select the days of the week
(2) Select times you want availability across those days of the week
(3) Delete Schedule button
(4) Add another time selection bar
(5) Add new schedule (for different days & times)
(6) Cancel / Confirm
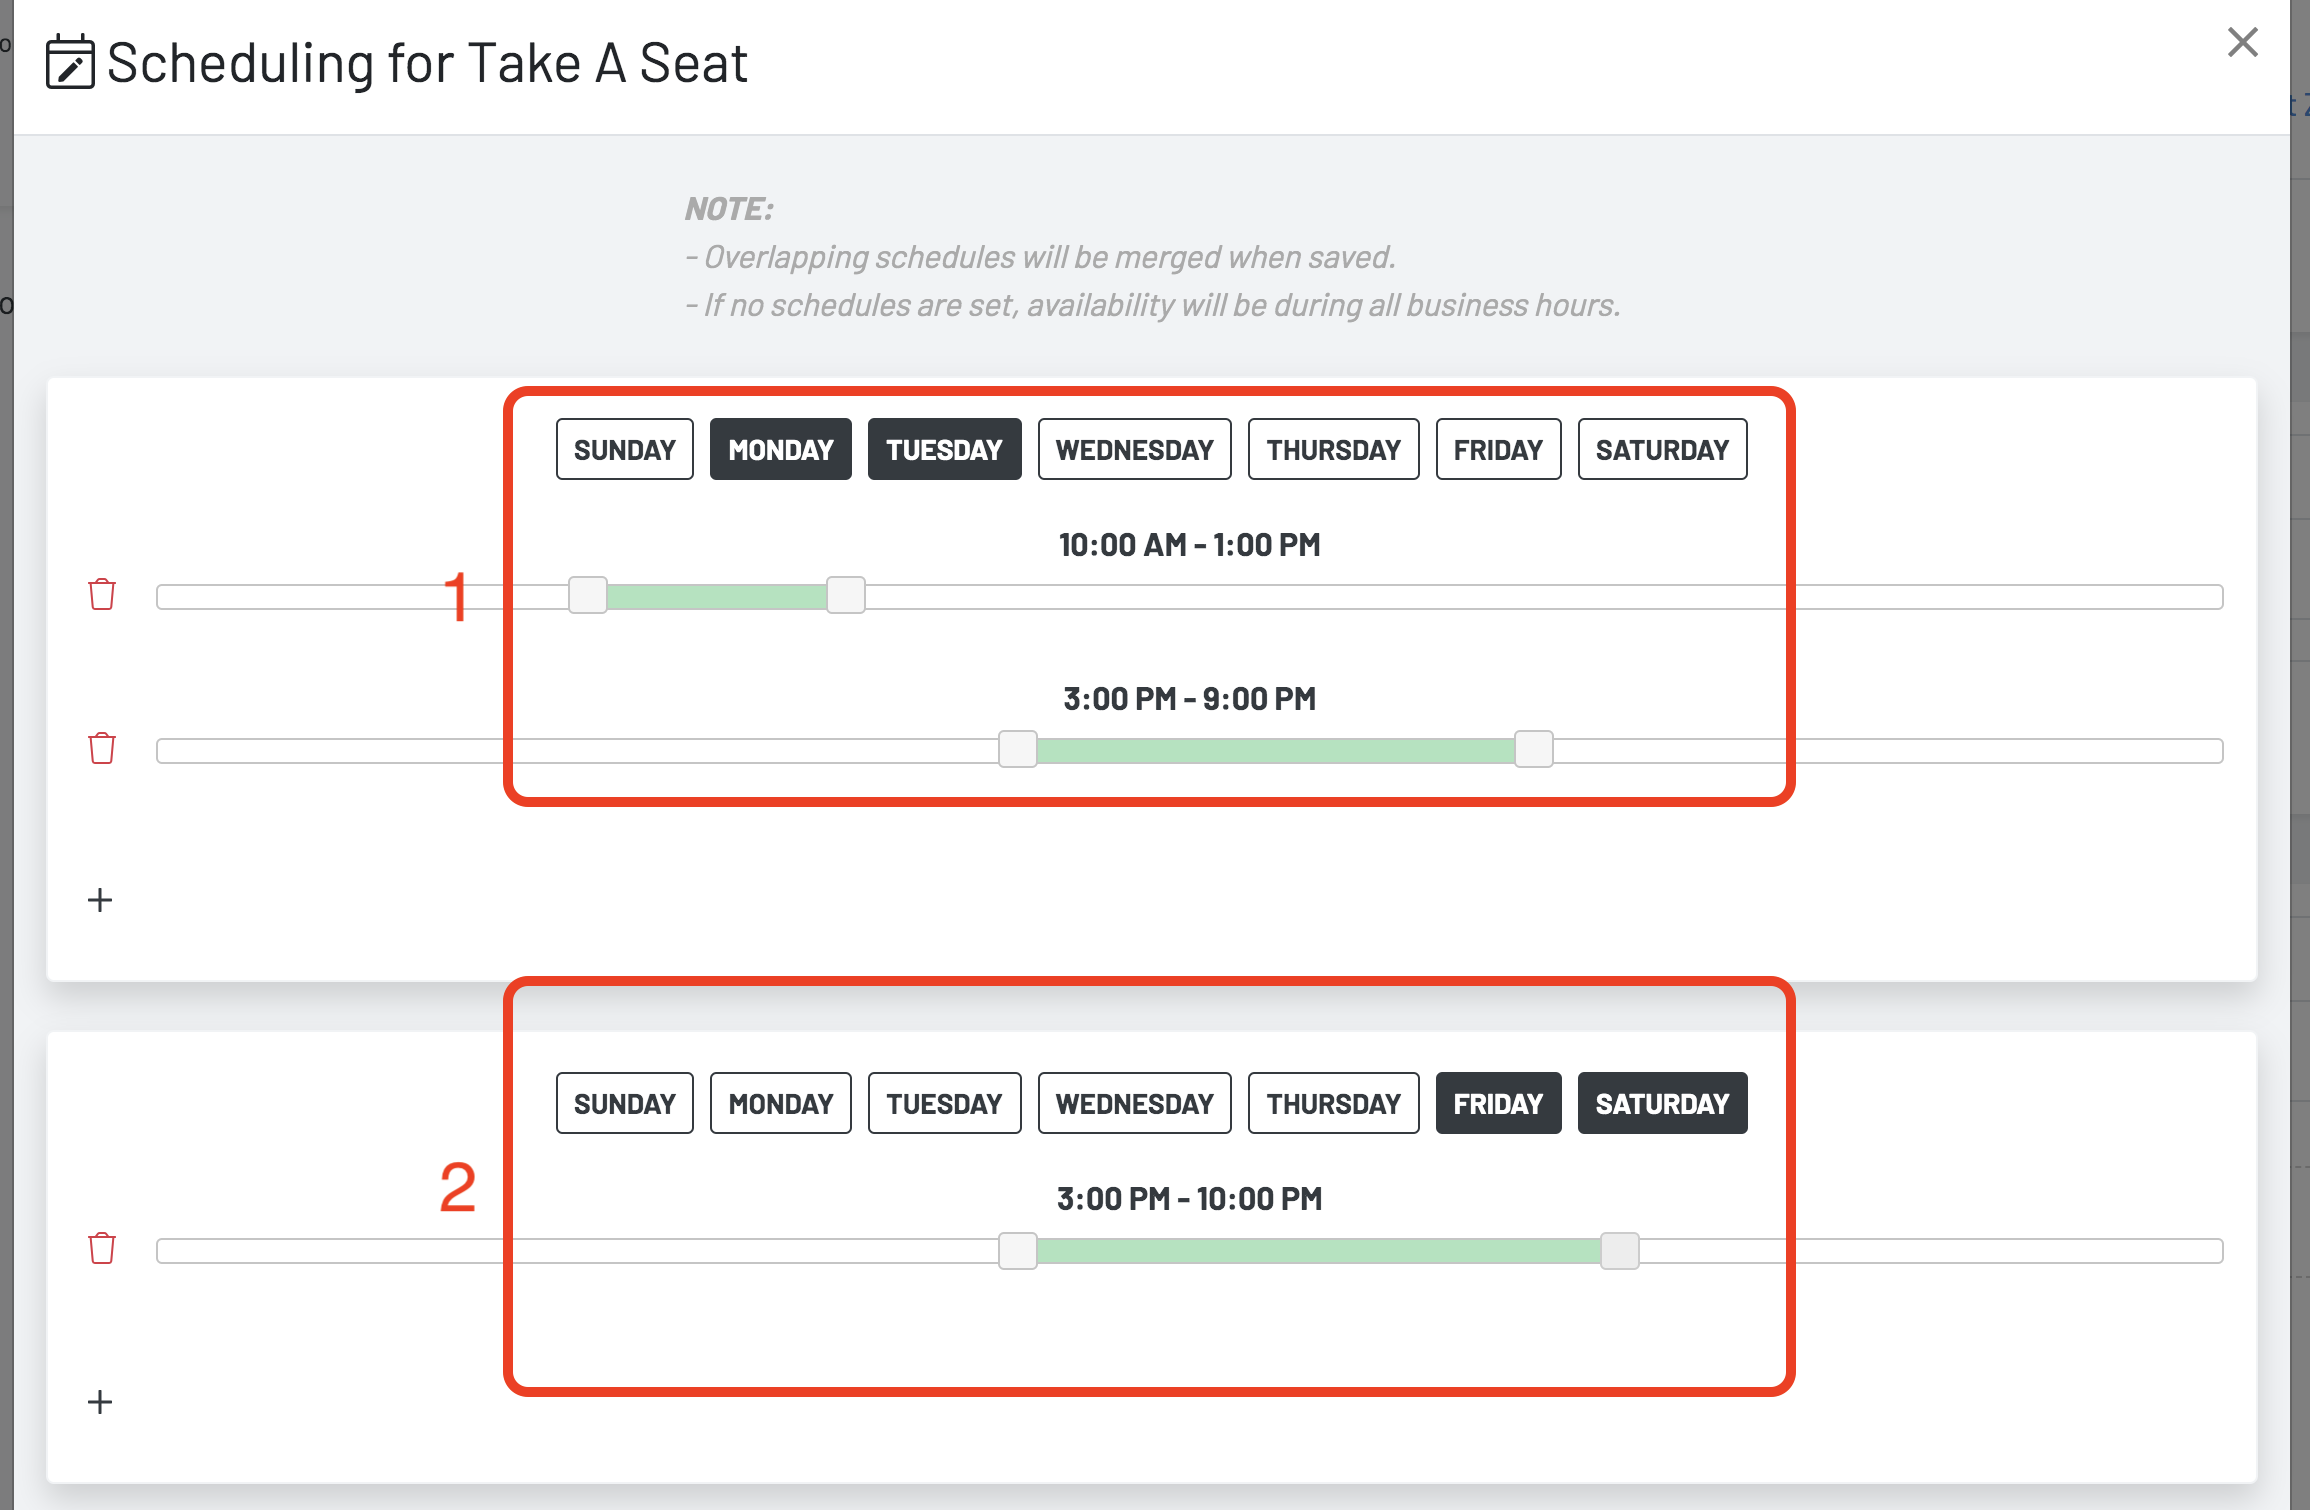
(1) This is an example of creating a "time gap" across multiple days. This will shut your zone off at 1p and re-activate the zone at 3p.
(2) This is an additional schedule added with later times during the weekend.
- Save your work.
