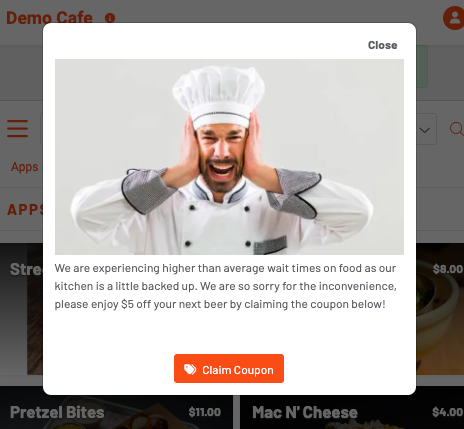
You can mass communicate messages to guests including highlighting a promotion, warning the kitchen is backed-up, or communicating any other updates. In addition, you can add videos, pictures, schedules, and even coupons to your notice.
To create a notice press Notices > + Add Notice

You can modify the following for your notice:
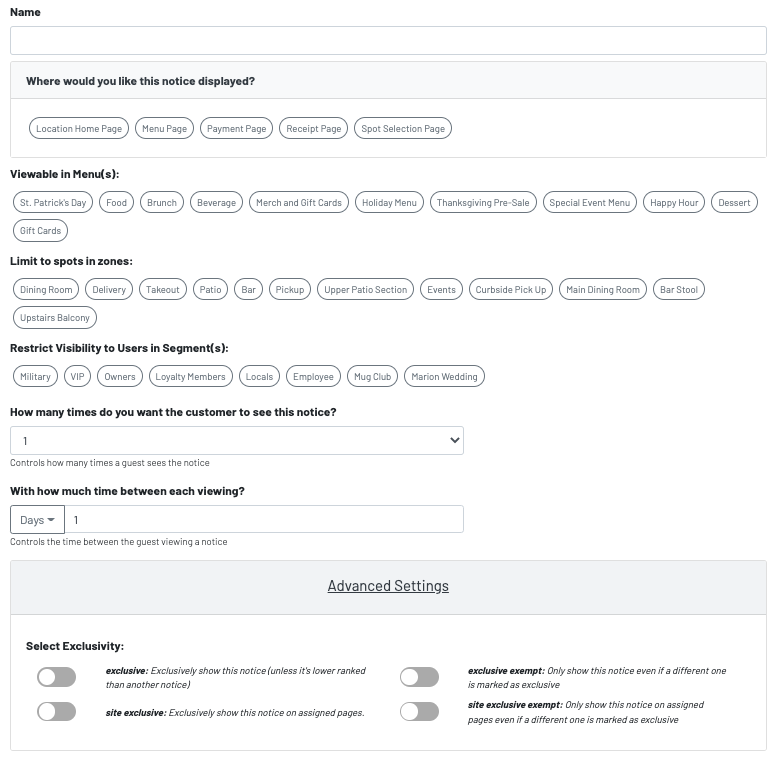
First, you'll choose the name for your notice and where you'd like it to appear. If you only want it to appear on certain menus or zones, you can choose those next. Additionally, you can choose to only have notices appear for users in particular segments. If you'd like your notice to appear more than once for a customer, you can edit that next. Finally, you can control how much time in days, hours, or minutes that you'd like to pass before your notice will appear again for a particular customer. Under Advanced Settings, you can control the exclusivity of your Notice.
Once you have decided where and how often you'd like customers to see the notice, you are ready to add text. This text is completely customizable to make your Notice appear exactly how you'd like. You also have the option to add a coupon or a CTA (call to action) button*. Call to action buttons allow you to create a hyperlink for guests. A few use cases could be directing them to your website, a featured menu, or to sign up for your loyalty program.
*only one option here can be selected for each Notice.

How a notice will look on your QR menu for guests:
Click here to learn how to add a CTA Button to digital receipts.