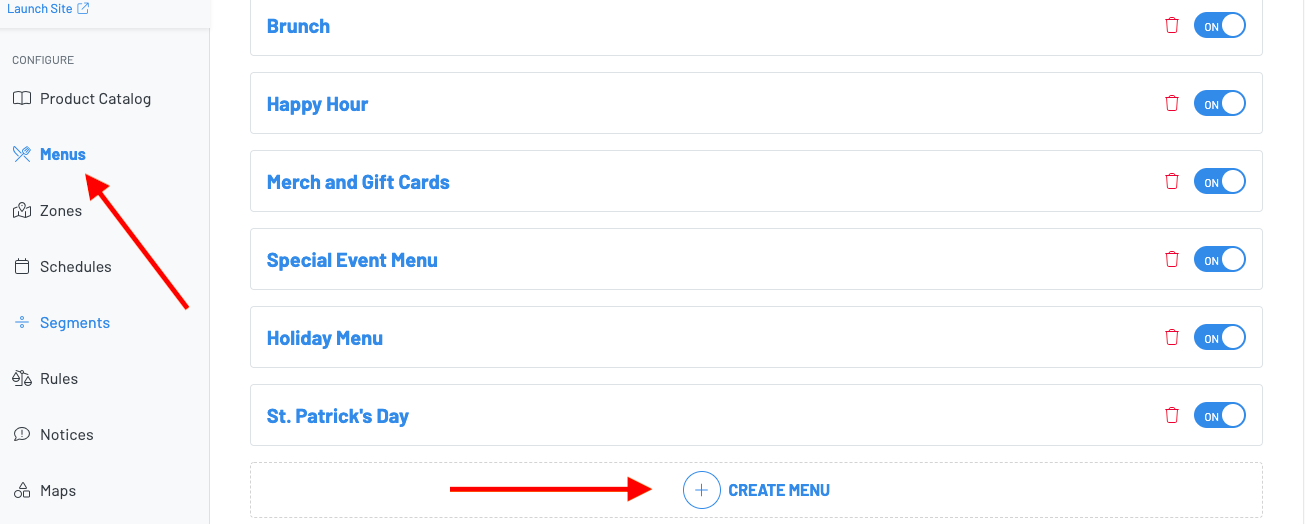
Navigate to your Manager Dashboard, then press Menus > + Create Menu
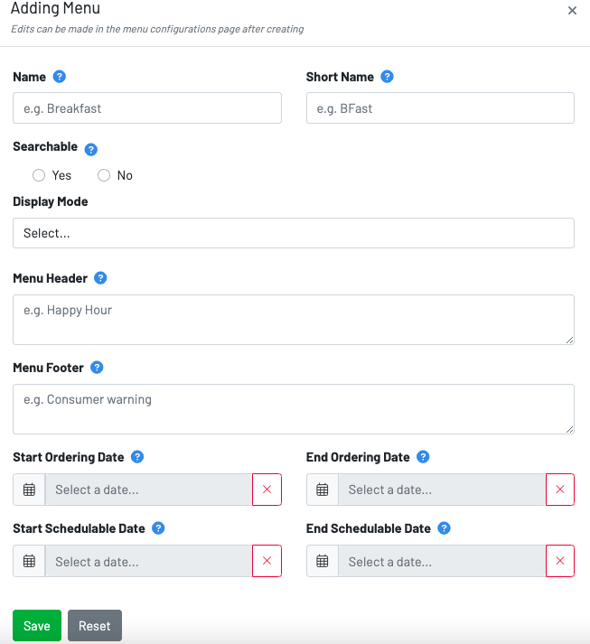
- Name: Input the name of the menu
- Short Name: This will automatically appear on the POS (EX: The menus name is Draft Beers but you make the short name Draft for ease of navigation)
- Searchable: Hides this menu from any user selection. The menu may only be accessed by scanning a code or using a direct link. Searchable on allows guests to navigate to the menu from the landing page. Searchable off keeps your menu accessible only by scanning a QR or clicking on a direct link. In most cases, searchable should always be enabled on.
- Display Mode: This setting controls the menu layout. The various displays modes are pictured below.

- Menu Header and Menu Footer: Input announcements, hours of operations, and consumer warnings.
- Start and End Ordering Date: The ordering date is the time frame in which the guest can order from the menu. If not set, a guest can begin an order any time.
- Start and End Start Schedulable Date: The schedulable date is when the guest can pick-up their order.
Once you have finished filling out this information, click into the menu to finish the menu creating process.
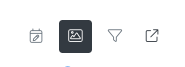
- Calendar Icon: Schedule allowing you to adjust when the menu is available for guests to view and order from
- Image Icon: Attach Image to display an image for your menu on the landing page
- Funnel Icon: Filters and Tagging allows you to include or exclude items that are tagged in your product catalog.
- Example: Create a tag called "Bottle Beer" and tag all of your beer bottles
- Arrow Icon: Opens Menu - this is a quick and easy way to access your menu for testing/viewing. Pro tip: Keep your menu with searchable set to "No" until you are done, and access from here.

- Menu: Allows you to edit all information already added.
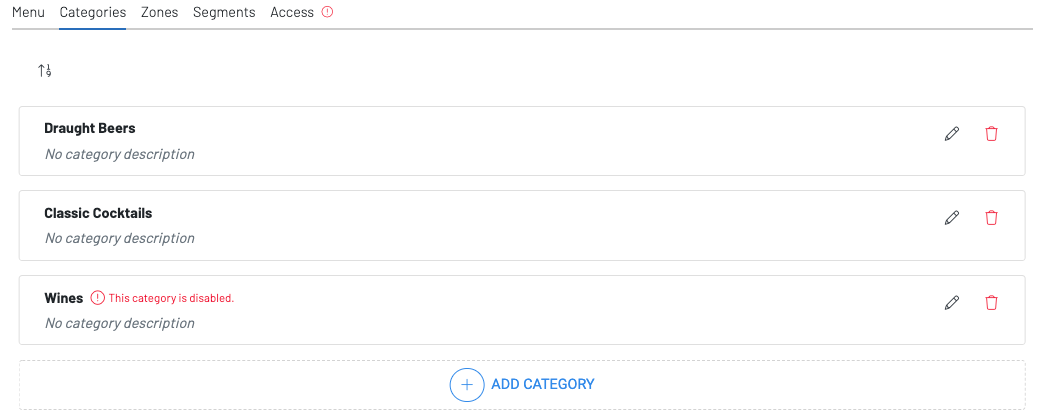
- Categories: This is where we will add categories that we've created in our product catalog to our menus. Click +Add Category to add additional categories from your product catalog to your menu. If we've created a category in the product catalog and haven't added it to a menu yet, it will not show.
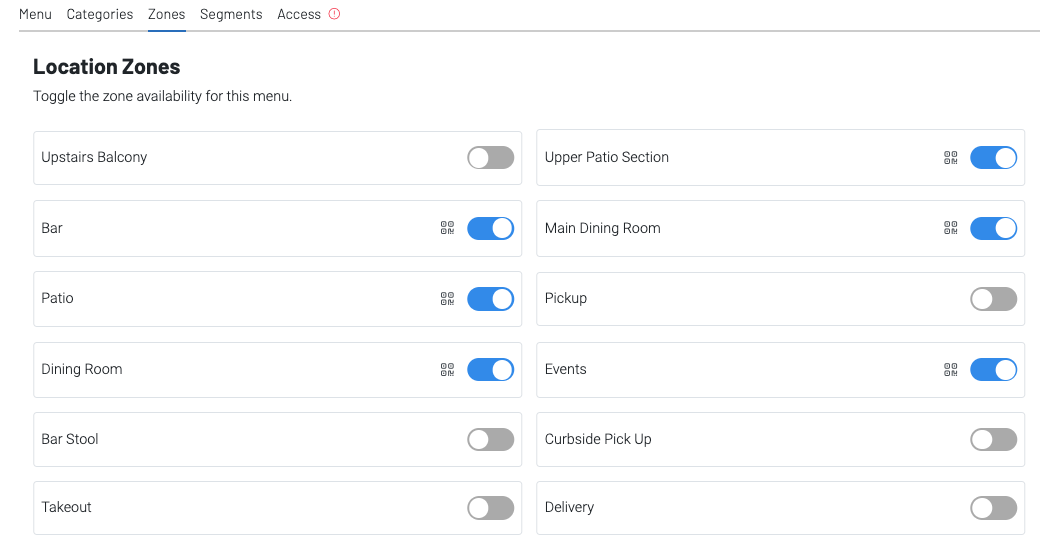
- Zones: The Zones header lets you choose where to have your menu available. The menu will adopt the settings of each zone that it is placed in.
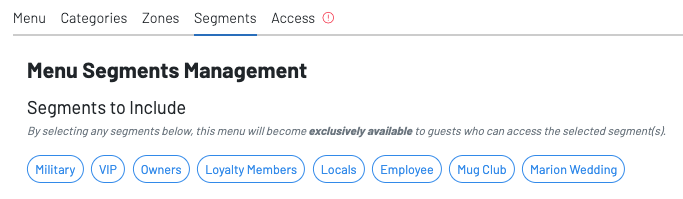
- Segments allows you to have this menu be accessible to only a certain group of people.
- Access allows us to share a copy with partners and third party integrations as well as across locations, when applicable.
Once we've gone through and created our menu, be sure to double check that the menu is toggled on and ready for use.
