Feature Definition: “How to create a Takeout Zone”
When to Use: (Add one or more of the bullet points below)
- Takeout
- POS
- Multi-Location
Benefits: Takeout Service and pre-sales.
To create a new Takeout Zone:
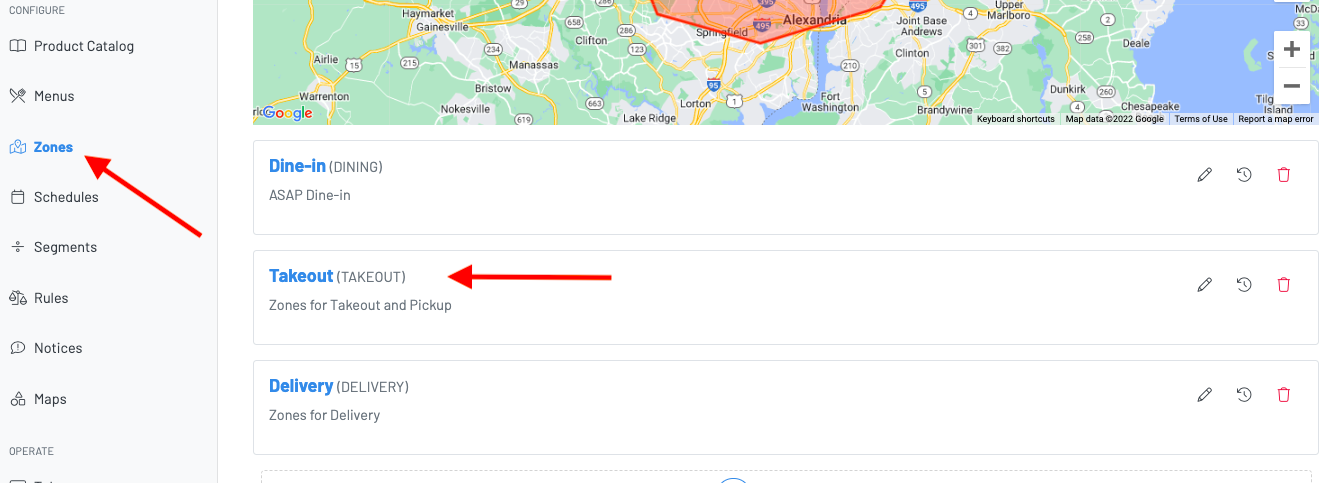
(1) Navigate to the Zones page in the GoTab menu
(2) Select "Takeout"
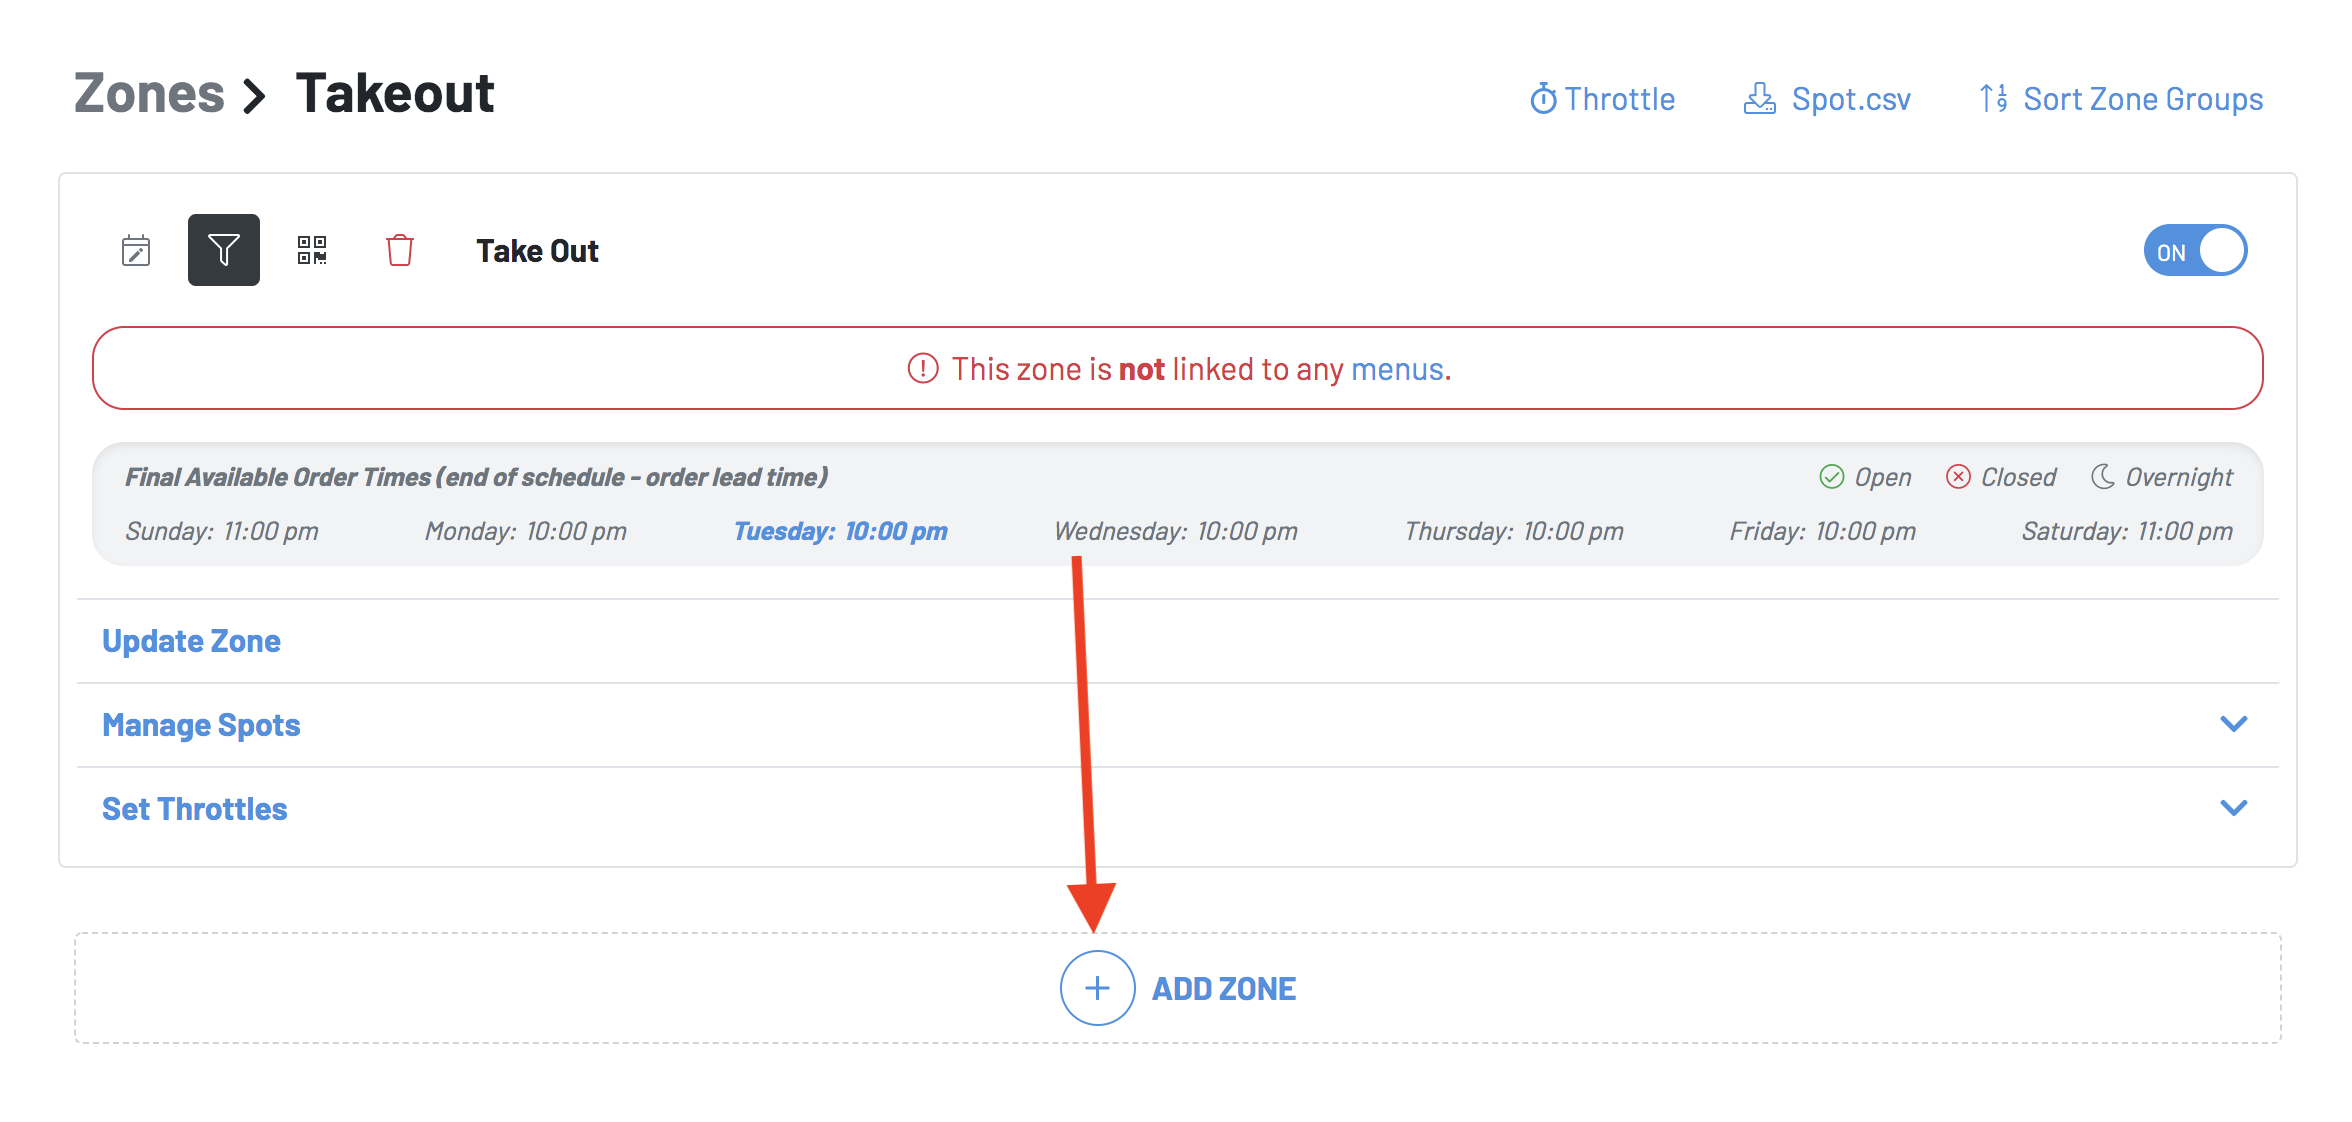
Scroll down and select +add zone
Fill out the New Zone info. This info will apply to all spots (QRs) within the zone. Different rules for different spots will require a new zone.
- Name
- Minimum order subtotal: the amount of purchases (in dollars) required to place an order.
- Tip Scale: Design different tip scales per zone. You will also select the default tip here.
- Service Charge: Set service fees in Location Settings: Service Charges and apply the percentages to individual zones. This works well if you are having an event zone and would like an auto-gratuity set up only for that zone.
- Open Tab Requirement: The information a location wants guests to input before they open a tab. This should always be set to requires customer card and phone on file.
- Prompt Guest for Name on Scan: You can choose to set this to yes or no.
- Unavailability Message: A brief message should the guest try to place orders after hours.
- Order Notes Prompt: A text box that appears at the end of the guest ordering flow to account for any guest requests (example: "Any special requests?"). The guest notes will appear on printed tickets and on the KDS.
- Order Prompts: Customized prompts that are either binary checkboxes or an open text field for the guest to write in displayed on the payment screen. The best use case for the checkbox prompts include napkins, sauce, water, extra plates, extra utensils, and see server. The open text prompt can be set to required - a great use for the prompt is for curbside ordering, ensuring guests enter their vehicle make and model.

- Allow Order Notes: Order notes are an open text field for guests to write freely during checkout. The guest notes will appear on printed tickets and on the KDS. You can choose to set up order note prompts or simply hit yes under allow order notes.
- Order Lead Time (Min): Time needed to fulfill when the guest places an order.
- Maximum Advance Order Days: Furthest ahead takeout orders can be placed.
- Schedule Time Step (Min): The time increments guests select from when placing an order (5, 10, 15, and 30 minute increments).
- ASAP Only Zone: All orders placed in the zone will be scheduled as soon as possible. This will disable the ability to allow any scheduled orders.
- Allow ASAP Orders: Allows orders to be scheduled as soon as possible.
- Automatic Order Confirmation Text: This sends the guest an SMS message confirming their order. This should always be enabled.
- Automatic Order Fulfillment Text: This will send a guest an SMS message confirming the completion of their order once it is fulfilled on the KDS.
- Show Tips Selector By Default: This setting controls whether the guest views the tip selector bar.
- Searchable: Hides this zone from any spot selectors. The spots in the zone may only be accessed by scanning a code or using a direct link. This should always be enabled.
- Joinable: Allows open tabs to be joinable at this zone.
- Discoverable Server Tabs: Allow tabs started by servers to be discoverable when guests scan the spot QR.
- If Discoverable Server Tabs is toggled on as YES: Initial Tab Discoverable: Allows operators the ability to choose the time that discoverable tabs start at.